Editing Techniques for Stunning Travel Photography in 2026 (Complete Guide)
Introduction
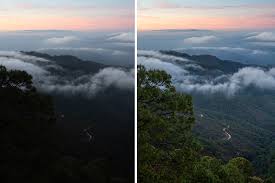
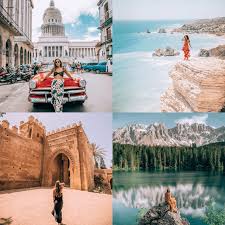
Travel photography is not just about capturing beautiful destinations—it is about transforming raw images into visually compelling stories. In 2026, post-processing has become an essential part of modern photography workflows, especially with the rise of high-resolution mirrorless cameras and powerful editing tools like Adobe Lightroom and Photoshop.
Even the best-shot image can look ordinary without proper editing. On the other hand, a well-edited photo can turn an average scene into a cinematic masterpiece.
This guide will cover the most important editing techniques for travel photography, helping photographers in the United States enhance color, light, mood, and storytelling in their images.
Why Editing Matters in Travel Photography
Editing is not about “fixing bad photos”—it is about enhancing what is already there.
Good editing helps you:
- Correct exposure and white balance
- Enhance colors and mood
- Improve composition through cropping
- Remove distractions
- Create a consistent visual style
Most professional travel photographers spend more time editing than shooting.
Essential Editing Software
1. Adobe Lightroom (Core Tool)
Lightroom is the foundation of modern photography editing.
Key Features:
- Exposure and contrast control
- Color grading tools
- Lens correction
- Presets and batch editing
- RAW file processing
Why It Matters
Lightroom is ideal for travel photographers who need fast, consistent editing across large photo sets.
2. Adobe Photoshop (Advanced Editing)
Photoshop is used for detailed and advanced edits.
Key Features:
- Object removal
- Sky replacement
- Advanced retouching
- Composite editing
- Fine detail enhancement
Why It Matters
Photoshop gives full creative control for commercial-level travel photography.
Step-by-Step Travel Photo Editing Workflow
Step 1: Import and Organize
- Sort images by location or trip
- Select best shots
- Remove duplicates and blurry images
Step 2: Basic Adjustments (Lightroom)
Start with global corrections:
- Exposure
- Contrast
- Highlights and shadows
- White balance
- Clarity and texture
Step 3: Color Grading
Color defines mood in travel photography.
Common Styles:
- Warm tones → sunsets, deserts
- Cool tones → mountains, winter scenes
- Cinematic teal & orange → urban travel
Step 4: Lens Correction
Correct distortion, vignetting, and chromatic aberration for a cleaner professional look.
Step 5: Local Adjustments
Use selective tools to enhance specific areas:
- Brighten subject
- Darken background
- Enhance sky details
- Improve foreground contrast
Step 6: Cropping and Composition Refinement
Even after shooting, composition can be improved:
- Apply rule of thirds
- Remove distractions at edges
- Improve balance and framing
Step 7: Noise Reduction and Sharpening
Especially important for:
- Low-light travel photos
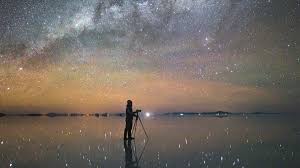
- Night photography
- High ISO images
Lightroom and AI tools help reduce noise while maintaining detail.
Advanced Editing Techniques
1. HDR Blending
Combines multiple exposures to balance highlights and shadows.
2. Panorama Stitching
Used for wide landscapes and cityscapes.
3. Dodge and Burn
Enhances depth and dimensionality by selectively brightening and darkening areas.
4. Sky Enhancement
Improve dramatic skies in travel landscapes using subtle adjustments (avoid over-editing).
Creating a Consistent Photography Style
A strong travel photography portfolio has a consistent look.
How to Achieve It:
- Use the same color grading style
- Apply similar contrast levels
- Build and reuse Lightroom presets
- Maintain consistent lighting tone
Consistency builds brand identity for photographers and content creators.
Common Editing Mistakes
1. Over-Editing
Too much saturation or contrast makes images look unnatural.
2. Inconsistent Style
Mixing different editing styles weakens portfolio identity.
3. Ignoring RAW Files
JPEG files limit editing flexibility—RAW is always preferred.
4. Overusing Presets
Presets are a starting point, not a final solution.
Recommended Workflow for Travel Photographers
- Shoot in RAW format
- Import into Lightroom
- Apply global adjustments
- Fine-tune color grading
- Export for web or print
- Use Photoshop for advanced edits if needed
Gear That Helps Editing Workflow
While editing is software-based, proper gear improves efficiency:
- High-resolution monitors (color accuracy)
- Fast SSD storage drives
- Powerful laptops or desktops
- Calibrated display tools
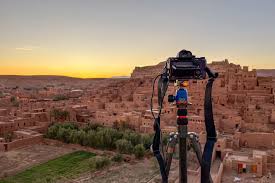
Recommended Lens Connection for Editing Quality
Better shooting = easier editing.
High-quality lenses reduce:
- Noise
- Chromatic aberration
- Sharpness issues
Recommended lenses:
- Canon RF 24-70mm f/2.8L
- Sony 16-35mm GM
- Canon RF 70-200mm f/2.8L
Full lens breakdowns are available in the Lens & Accessories section on ShotInspect.
Final Thoughts
Editing is where photography truly comes alive. In 2026, with powerful tools like Adobe Lightroom and Photoshop, photographers have more creative control than ever before.
However, great editing starts with good shooting. The best travel photographers in the U.S. combine strong composition, proper exposure, and thoughtful post-processing to create images that stand out globally.
Editing is not about changing reality—it is about revealing the best version of it.
SEO Keywords Used Naturally
travel photography editing 2026, Lightroom editing tutorial, Photoshop photography workflow, color grading travel photos, HDR photography editing, best editing software photographers, Adobe Lightroom tips USA, professional photo editing guide