How This Award-Winning Portrait Was Shot (Lighting & Camera Settings Breakdown)
Introduction
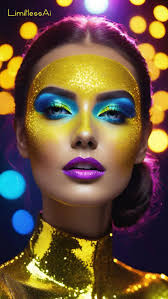
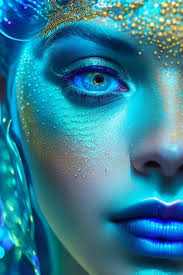
Award-winning portrait photography often looks effortless—but behind every powerful image is a carefully planned combination of lighting, composition, camera settings, and post-processing techniques.
In this case study, we break down how a professional-level portrait is created, analyzing the key decisions that turn a simple photo into an award-winning image.
This type of breakdown is commonly searched by photographers in the United States who want to understand how professional portraits are actually created in real-world conditions.
The Concept Behind the Portrait
Great portraits always start with a concept.
In most award-winning portrait work, the goal is to capture one or more of the following:
- Emotion
- Character depth
- Mood storytelling
- Visual simplicity
- Strong subject separation
The photographer’s intention is more important than the equipment used.
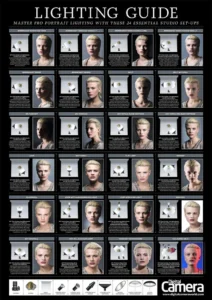
Lighting Setup Breakdown
Lighting is the most important factor in portrait photography.
Common professional lighting setups:
1. Soft Natural Window Light
- Used for emotional, natural portraits
- Creates soft shadows and skin tones
- Common in editorial photography
2. Studio Softbox Lighting
- Controlled environment
- Balanced highlights and shadows
- Ideal for commercial portraits
3. Rim Light + Key Light Combination
- Adds depth and separation
- Creates cinematic look
- Often used in award-winning portraits
Camera Settings Used in Professional Portraits
Typical settings for high-end portrait photography:
- Aperture: f/1.4 – f/2.8 (subject isolation)
- ISO: 100–800 (low noise control)
- Shutter Speed: 1/125 – 1/250
- White Balance: adjusted based on lighting setup
👉 The goal is always sharp subject + controlled background blur
Lens Choice Matters
Most professional portraits use prime lenses for maximum sharpness and bokeh.
Common choices:
- 85mm f/1.4 (most popular portrait lens)
- 50mm f/1.2 or f/1.4
- 135mm f/1.8

